Barnwood Bricks ®
Barnwood Bricks ® - Installation Techniques
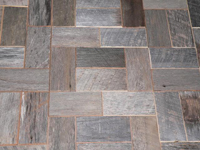
Creating your own specific pattern is one of the most fun parts of installation. Play with the bricks for a while, and you will see that many different patterns can be created. Once your pattern has been created, then you can do a pop string lay out, or draw lines in specific areas as needed. The possibilities for patterns are limited only to your imagination.
Installation of Barnwood Bricks ® is easy and simple. Our barnwood bricks are similar to antique pavers or tiles. They are put down with a special glue and grouting system. The sanded grout actually comes in caulking tubes and is easy to apply. The sanded grout is not messy during installation. This glue and grout system is what makes the Barnwood Bricks ® hardwood flooring, wall cladding, ceiling panels, backsplash, and counter tops applicable for any residential home, commercial building, or restaurant. Choosing the correct glue is essential for this flooring. A trowel is used for spreading the glue. This can be done individually on the bottom of each brick, or trowel a medium size area where bricks are to be installed and then stick them down. Spacers can be used between the barnwood bricks just like regular tiles or pavers. After bricks are glued down, let dry for 24 hours. Now it is time to apply the finish and grout. One good finish that we like is Varathane in semi gloss or satin. This is a flooring finish that you can get at Lowes. It does not smell and dries quickly in 2 hours between coats. Varathane can be applied with a brush or roller. Always be sure to read all instructions on any hardwood flooring finish product, glue product, or grout.
We will include written installation instructions with your order. While installation of Barnwood Bricks ® is fun and simple, it is important that you give us a call for detailed directions to make your floor the showpiece of your home or business. Should you choose to have a skilled reclaimed flooring installer or tile installer apply your floor, you will want to make sure they call us as well.
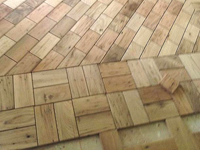 First step is to glue wood tiles, Barnwood Bricks ® , down using Bostik Best floor glue. Use 1/16" spacers to keep the grout lines even for grouting. Let set and dry for 24 hours.
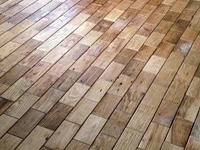 Next step is to sand if desired. Then apply the first two coats of clear flooring finish such as Varathanes or Bona High Traffic. Let this set for 24 hours. Flooring is now ready for grouting. Using the Keracaulk sanded grout ( comes in caulking tubes ), start applying grout into the grout lines in 1-2 square foot areas. Keep handy a small bucket of water and clean rags. Wipe your finger across the grout line to smooth and indent. You will accumulate some grout on tip of finger, and you can just wash off in the water bucket. Clean off bricks with clean rags if you see any excess grout. Keep applying until grouting is finished. Let set 24 hours.
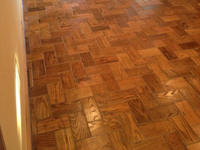 Apply final finishes of flooring finish as recommended by the manufacturer. Step back, admire your work, and enjoy your new floor!

